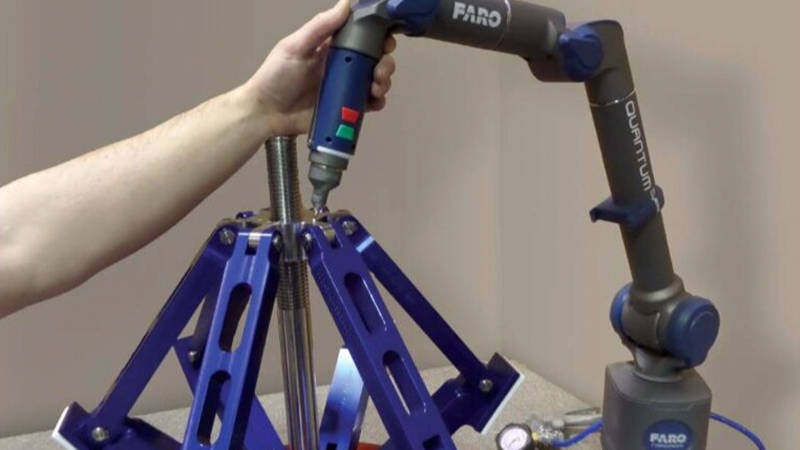
Quantum Max FaroArm® Series
-
Value
-
Performance
-
Features
-
Applications
-
Specifications
Business Value of FaroArms
FaroArms By Performance Level
FaroArm Features
3D Metrology Applications
Improved Quality Control and Inspection
Verify dimensional accuracy and identify deviations from nominal CAD data during first-article and in-process inspection, as well as inspection of incoming parts. See quality control and inspection applications >
Production, Fabrication and Assembly
Keep production machinery calibrated and aligned, and verify dimensional accuracy of tooling and parts. See production, fabrication and assembly applications >
Faster, More Accurate Product Design and Engineering
Expedite reverse-engineering and rapid prototyping for shorter time to market. See product design and engineering applications >
FaroArm Accuracy - Contact Measurement* (7-Axis)
|
QuantumS Max |
|||||
| 7-Axis | SPAT1 | PSIZE2 | PFORM3 | LDIA4 | EUNI5 |
| 2.0m (6.6ft) | 0.018mm 0.0007in |
0.01mm 0.0004in |
0.02mm 0.0008in |
0.04mm 0.0016in |
0.025mm 0.001in |
| 2.5m (8.2ft) | 0.02mm 0.0008in |
0.011mm 0.0004in |
0.022mm 0.0009in |
0.044mm 0.0017in |
0.028mm 0.0011in |
| 3.0m (9.8ft) | 0.032mm 0.0013in |
0.016mm 0.0006in |
0.032mm 0.0013in |
0.074mm 0.0029in |
0.05mm 0.002in |
| 3.5m (11.5ft) | 0.045mm 0.0018in |
0.02mm 0.0008in |
0.039mm 0.0015in |
0.09mm 0.0035in |
0.062mm 0.0024in |
| 4.0m (13.1ft) | 0.055mm 0.0022in |
0.026mm 0.001in |
0.044mm 0.0017in |
0.108mm 0.0043in |
0.076mm 0.003in |
|
QuantumM Max |
|||||
| 7-Axis | SPAT1 | PSIZE2 | PFORM3 | LDIA4 | EUNI5 |
| 2.0m (6.6ft) | 0.023mm 0.0009in |
0.012mm 0.0005in |
0.024mm 0.0009in |
0.045mm 0.0018in |
0.029mm 0.0011in |
| 2.5m (8.2ft) | 0.027mm 0.0011in |
0.013mm 0.0005in |
0.026mm 0.001in |
0.049mm 0.0019in |
0.032mm 0.0013in |
| 3.0m (9.8ft) | 0.042mm 0.0017in |
0.02mm 0.0008in |
0.036mm 0.0014in |
0.08mm 0.0031in |
0.054mm 0.0021in |
| 3.5m (11.5ft) | 0.055mm 0.0022in |
0.024mm 0.0009in |
0.043mm 0.0017in |
0.096mm 0.0038in |
0.066mm 0.0026in |
| 4.0m (13.1ft) | 0.065mm 0.0026in |
0.029mm 0.0011in |
0.048mm 0.0019in |
0.118mm 0.0046in |
0.082mm 0.0032in |
|
QuantumE Max |
|||||
| 7-Axis | SPAT1 | PSIZE2 | PFORM3 | LDIA4 | EUNI5 |
| 2.0m (6.6ft) | 0.028mm 0.0011in |
0.016mm 0.0006in |
0.035mm 0.0014in |
0.05mm 0.002in |
0.04mm 0.0016in |
| 2.5m (8.2ft) | 0.035mm 0.0014in |
0.02mm 0.0008in |
0.04mm 0.0016in |
0.055mm 0.0022in |
0.046mm 0.0018in |
| 3.0m (9.8ft) | 0.055mm 0.0022in |
0.028mm 0.0011in |
0.051mm 0.002in |
0.088mm 0.0035in |
0.066mm 0.0026in |
| 3.5m (11.5ft) | 0.075mm 0.003in |
0.036mm 0.0014in |
0.062mm 0.0024in |
0.11mm 0.0043in |
0.082mm 0.0032in |
| 4.0m (13.1ft) | 0.095mm 0.0037in |
0.044mm 0.0017in |
0.075mm 0.003in |
0.136mm 0.0054in |
0.1mm 0.0039in |
FaroArm Accuracy - Contact Measurement* (6-Axis)
|
QuantumS Max |
|||||
| 6-Axis | SPAT1 | PSIZE2 | PFORM3 | LDIA4 | EUNI5 |
| 2.0m (6.6ft) | 0.016mm 0.0006in |
0.008mm 0.0003in |
0.017mm 0.0007in |
0.03mm 0.0012in |
0.024mm 0.0009in |
| 2.5m (8.2ft) | 0.018mm 0.0007in |
0.009mm 0.0004in |
0.018mm 0.0007in |
0.032mm 0.0013in |
0.026mm 0.001in |
| 3.0m (9.8ft) | 0.027mm 0.0011in |
0.012mm 0.0005in |
0.026mm 0.001in |
0.046mm 0.0018in |
0.038mm 0.0015in |
| 3.5m (11.5ft) | 0.036mm 0.0014in |
0.016mm 0.0006in |
0.034mm 0.0013in |
0.064mm 0.0025in |
0.052mm 0.002in |
| 4.0m (13.1ft) | 0.045mm 0.0018in |
0.02mm 0.0008in |
0.038mm 0.0015in |
0.078mm 0.0031in |
0.063mm 0.0025in |
|
QuantumM Max |
|||||
| 6-Axis | SPAT1 | PSIZE2 | PFORM3 | LDIA4 | EUNI5 |
| 2.0m (6.6ft) | 0.02mm 0.0008in |
0.01mm 0.0004in |
0.022mm 0.0009in |
0.035mm 0.0014in |
0.027mm 0.0011in |
| 2.5m (8.2ft) | 0.023mm 0.0009in |
0.013mm 0.0005in |
0.023mm 0.0009in |
0.038mm 0.0015in |
0.03mm 0.0012in |
| 3.0m (9.8ft) | 0.034mm 0.0013in |
0.016mm 0.0006in |
0.032mm 0.0013in |
0.052mm 0.002in |
0.042mm 0.0017in |
| 3.5m (11.5ft) | 0.044mm 0.0017in |
0.02mm 0.0008in |
0.039mm 0.0015in |
0.068mm 0.0027in |
0.056mm 0.0022in |
| 4.0m (13.1ft) | 0.053mm 0.0021in |
0.024mm 0.0009in |
0.044mm 0.0017in |
0.084mm 0.0033in |
0.067mm 0.0026in |
All values represent MPE (Maximum Permissible Error)
* Contact Measurement (FaroArm) : In Accordance with ISO 10360-12. With optional 8-Axis (FaroArm + 8-Axis) full system performance based on ISO10360-12 Sphere Location Diameter Error (LDIA)
** Non-Contact Measurement (ScanArm and ScanArm + 8-Axis): Based on ISO 10360-8 Annex D; defined as LDIA (Sphere Location Diameter Error) - Diameter of the spherical zone containing the centers of a sphere measure from multiple orientations. Values are absolute
1 SPAT – Single Point Articulation Test
2 EUNI – Distance Error between two points comparing measured versus nominal values
3 PSIZE – Sphere Probing Size Error comparing measured versus nominal values
4 PFORM – Sphere Probing Form Error
5 LDIA – Sphere Location Diameter Error (Diameter of the spherical zone containing the centers of a sphere measured from multiple orientations)
